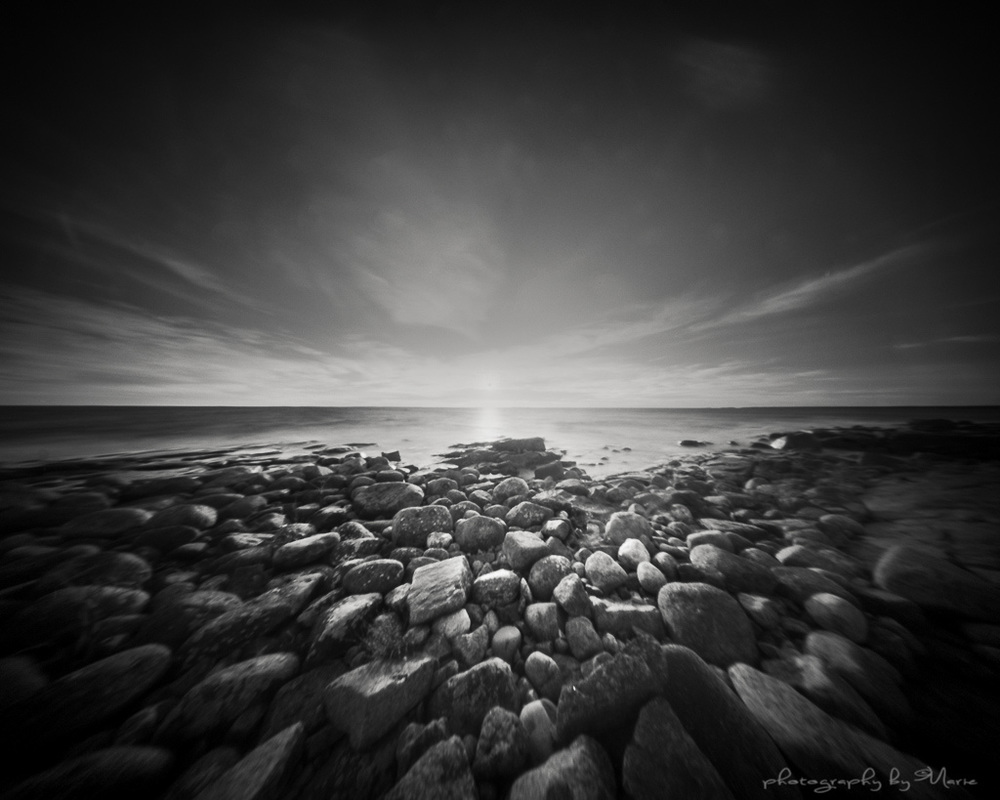
The heading photo is a detail of this image. It is a fantastic example of pinhole photography made on a beach by the photographer, Marie/shimmeringgains.com. This photograph specialises in making pinhole photos using film.
My work is all made using a Nikon D-SLR digital camera and a body cap with an opening over which I have stuck some foil which is pierced by a tiny hole to create the pinhole. Below you will see samples of my work and research to support my work and allow me to understand better the process and different effects that I could achieve. |
My Work
My work is shown below. I have included a contact sheet which gives an idea of some of my failures and my successes. I had to experiment with exposure values in the camera constantly as the camera was in full manual mode. I could only change the shutter speed and ISO setting as the pinhole has no aperture to change.
I used the pinhole camera to take a set of images of the area around my school building. I chose this as the light levels outside are brighter and I could then try to get photographs without too much blur. I am pleased with the images that I have shown as bigger photographs and will develop further these using Photoshop.
Using a pinhole camera has helped me a lot in understanding exposure in the camera and I am pleased to see potential effects that I could use in my work with a normal camera/lens set-up. I will experiment further with ideas of under-exposed photos being changed in Photoshop and see how this could produce interesting effects in my portrait project. I will also look at Katie Cook's photography (shown below) and hope to take some ideas and inspiration from this into my work.
NOW YOU SHOULD SEE CONTACT SHEETS
NOW YOU SHOULD SEE SELECTED IMAGES - with notes for each one - WHY SELECTED?
NOW YOU SHOULD SEE SOME EXAMPLES OF WORK POST-PROCESSED - with notes for each one - WHY CHANGED AND HOW CHANGED? SUCCESSFUL? CONNECT TO PORTRAIT WORK OR JUST TECHNIQUE?
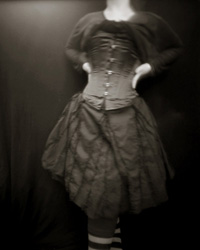
Katie Cook - example 1I have chosen this image which is part of the photographers' work using a pinhole camera to make portraits. Even though the subject's face is not seen I think this say a lot about the subject because of the pose and clothes. I want to explore this idea more in my portrait work.
|
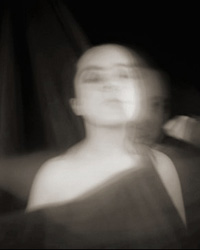
Katie Cook - example 2I love the feeling of movement in this image which still shows the subject's face clearly. It is one of many self-portraits made by the artists and works well with the dark background which is a great contrast to the skin.
|
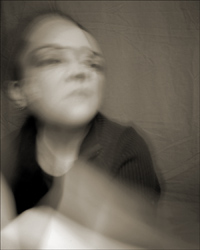
Katie Cook - example 3I like the composition if this image and the feeling of movement. It is another self-portrait and shows the subject well with a different look to the second example. The grey background works work with contrast between this and the face. I also like the blur of the hands (?) in the foreground.
|